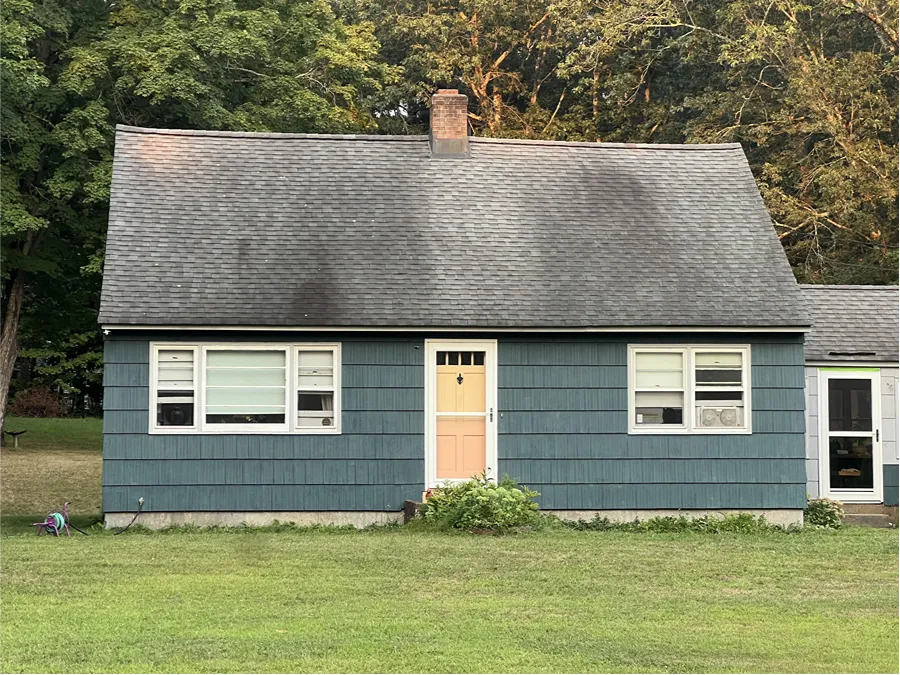
J-channel is a type of trim used in building construction, mostly with vinyl siding. It’s shaped like the letter “J” and helps give the outside of a house a neat and finished look. J-channel is used to hold the edges of siding panels in place and to hide rough or cut edges. It also helps keep water out of spots where it shouldn’t go (around windows or doors for example).
J-channel looks like a long strip of plastic or metal with a curved edge that forms the shape of a “J.” The long part of the “J” attaches to the house, and the curved part sticks out to catch the edge of the siding. These strips are usually white or a color that matches the siding. They come in different lengths and sizes depending on the job.

J-channel is used in many places on the outside of a house. Some common spots include:
· Around windows and doors: J-channel surrounds these areas so that the siding fits neatly around them.
· At the top of walls under the roofline: It finishes off the top edge of the siding.
· At corners and edges: It helps siding stay in place and covers any gaps.
· Under soffits (the part under the roof overhang): J-channel can help hold up soffit panels and give them a clean look.
J-channel is very important in making sure siding looks good and works well. It hides ugly edges and helps seal the outside of the home from wind and rain.

J-channel does more than just make siding look neat. It also protects the home from water damage. When it rains, water can get behind siding if the edges aren’t sealed. J-channel acts like a little gutter that redirects water away from those open edges.
Without J-channel, the siding might come loose, or water might get behind it and cause rot or mold. Over time, that could lead to expensive repairs. Using J-channel the right way helps the home last longer and stay safe.
Most J-channel is made from vinyl or aluminum. Vinyl J-channel is used with vinyl siding and is popular because it’s easy to work with, lightweight, and doesn’t rust. Aluminum J-channel is often used with metal siding. It’s stronger and can handle more heat or cold but may cost a bit more.
Both kinds can be cut to size with special tools and attached with nails or screws. The type of J-channel used depends on the siding material and the builder’s choice.

Installing J-channel takes careful measurement and planning. Here’s a simple overview:
1. Measure and cut the J-channel to fit around the window, door, or edge.
2. Attach the J-channel to the wall using nails or screws. Builders usually leave a little space for the material to expand in hot weather.
3. Slide the siding into the J-channel. The siding piece will sit inside the curved part of the “J,” holding it in place.
4. Seal the corners and edges if needed, to help keep out water.
It’s important for anyone installing J-channel to make sure all parts line up correctly. If it’s not installed properly, it might not work well or could make the siding look messy.
Even though it seems like a small part, J-channel plays a big role in how a house looks and how well it stays protected. It holds siding in place, hides rough edges, and helps stop water from getting inside the walls. When used the right way, J-channel helps create a strong, safe, and good-looking home exterior. It’s one of those behind-the-scenes pieces that many people don’t notice but make a big difference!