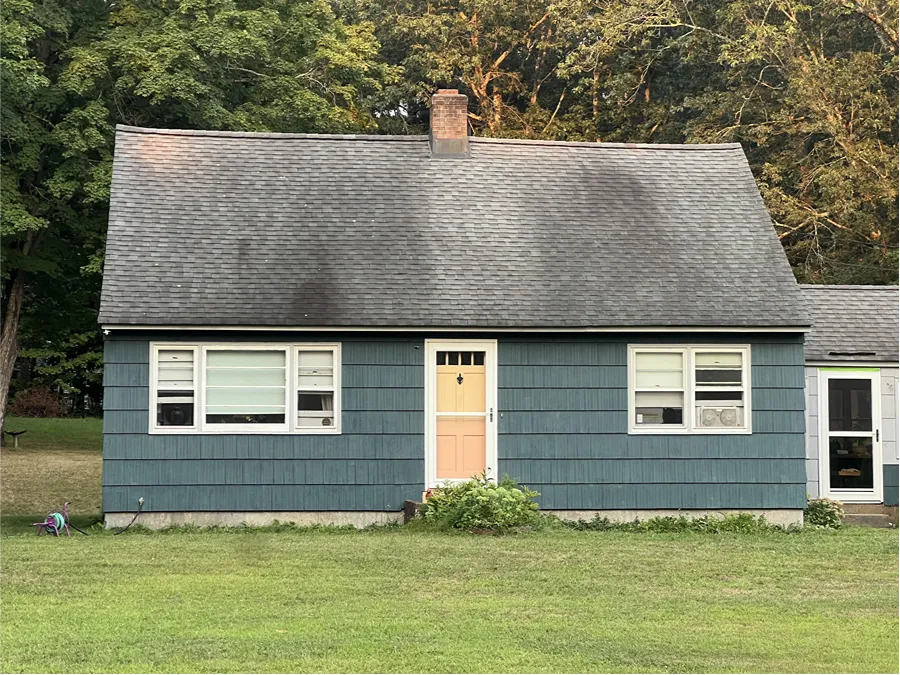
Door, window, and water table (aka skirtboard) areas are parts of your home that are potentially prone to water infiltration if their installs are not conducted correctly.
Compounding their already natural vulnerability as a possible location of allowing water into your home (due to the fact that these areas are all obviously “open” areas of your home without the door, window, or water table taking up the corresponding space!), is the horizontal tops of the trim in each of these types of areas which, if not properly protected, are an inviting entry point to any form of moisture that would like to make its way inside.
So how does one guard against moisture coming in from the tops of these areas?

The answer would be with the
proper installation of a type of flashing known as Drip Cap.
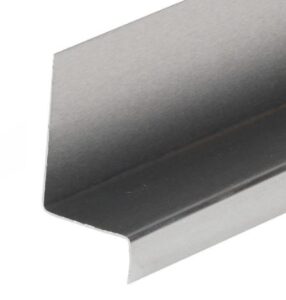
Drip cap can come in various sizes, depending upon the thickness of the piece of trim that it is being put in place to protect.
One can make drip cap themselves if they are handy with a metal-bending brake.
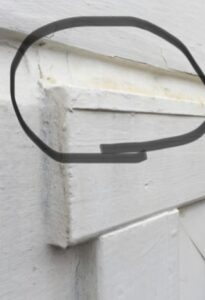
Above doors and windows, the drip cap is placed above the top of the top-most piece of trim of the door or window (the piece that horizontally travels across the door or window).

If you were to look at a side profile of a piece of drip cap, it has the appearance of looking like the side profile of a chair, except without its rear back legs.
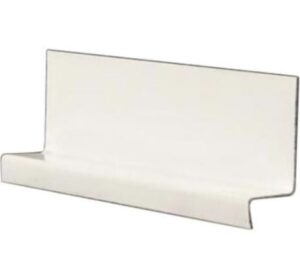
Imagining this, the horizontal portion of the drip cap sits on the top of the piece of trim one is working to flash.
The top of the drip cap is tucked into the back side of the siding directly above the piece of trim that is being flashed.

The bottom of the drip cap comes slightly down in front of this piece of trim – this allows for the “drip” of any moisture that hits the top of the piece of trim as it is prevented from working its way behind the trim and made to shed off the front of it.
These days, drip cap is most commonly made out of aluminum but it can also be made out of copper or plastic as well.
Another possible material that drip cap can be made out of, and how it usually was done “back in the day”, is lead.
When lead used to be the more common material to make drip cap out of, it tended to be positioned a little different than today, as many times the lead did not extend over the edge of the trim that it was being installed over.
I have never been a big fan of stopping at the edge, as I feel more comfortable knowing that any moisture hitting the top of a piece of trim we are installing has a clear path to be allowed to “drip” off of it.
Believe it or not, in the field we come across many cases of
non-existent drip cap, this is quite annoying.
When we find a scenario like this, our attention is often drawn to these areas due to wood that has rotted away in some capacity and in backtracking to figure out the cause, we discover that the drip cap is not properly where it should be.
Drip cap is EXTREMELY important!
If it is not accurately in place above door, window, or water table areas, rotted wood is something that is bound to happen and is never a question of “if” but “when” the moisture being allowed to penetrate the backside of the trim, will rear its ugly head, in the by-product of these rotting wood situations that could have easily have been prevented.

Have a Project in Mind?

Follow Us on Social Media!